Blog

  • Choosing the Right Interior Doors for Your Home

    Choosing the Right Interior Doors for Your Home

    Interior doors play a huge role in your home’s décor. The right doors should blend in and feel right in your hand. So whether you’re building or redecorating, let us help you choose.

    Shopping List

    Door | Door hinges | Architrave | Door handle and lock set

    Door Construction
    There are three types of interior doors: solid wood, solid core and hollow core. Solid wood doors are the most expensive option but they look great and provide that heavy feeling in the hand that is associated with quality. They are long-lasting, provide excellent heat and sound insulation, and can even increase the value of your property.

    Solid core doors consist of a moulded composite or plywood exterior on a frame that is filled with wood fibres. They achieve better fire ratings than hollow core doors, and also feel better in the hand because of their weight. They provide a similar look and level of heat and sound insulation to solid wood doors, but for a much lower cost.

    If heat and humidity levels fluctuate in your home, solid wood or solid core doors are not a good idea. Continually expanding and contracting wood can lead to door warping. This is where hollow core doors come to the fore. They cope with temperature and humidity fluctuations better and are also the cheapest option. Not completely hollow, a cardboard honeycomb is sandwiched between the plywood exterior panels. They feel lightweight in the hand, provide less insulation, and can be damaged if hit with a heavy object.

    Door Material
    Classic timbers such as oak, pine and walnut are timeless and suit both modern and traditional style homes. White doors give a clean and minimalist look, ideal for contemporary living areas.

    Doors can be purchased finished, pre-finished, primed or unfinished depending on your preference. Finished doors come are already coloured and protected, ready to use. Pre-finished doors are prepared with a layer of undercoat, ready for you to paint, stain or varnish in your chosen colour. Primed doors require sanding and undercoating before you can treat or paint them. Unfinished doors are the cheapest and have not been primed or prepared for painting.

    Door Style
    Is your home décor contemporary or traditional? Flush doors are sleek and minimalist in style and more suited to modern interiors. Panelled or Regency doors add depth and dimension that complements a traditional décor. If your home is low on space and natural light, doors with glass panels can help create a brighter and more spacious environment. Another option is to mount a mirror to the door, and for this, a Flush door is more suitable.

    Frames, Skirting & Architraves
    When you’re selecting your new interior doors, you should consider matching door frames, architraves and skirting. These come in the same materials, constructions and finishes as doors. The styles vary based on their bevelling.

  • How to Grout Floor Tiles

    How to Grout Floor Tiles

    Once your floor tiles are laid and set, it’s time to grout! As well as completing the look of your tiled floor with a finished, smooth appearance; grout protects the floor underneath the tiles from moisture. Grout also gives strength to your tiles, preventing them from moving and cracking. Our guide makes grouting easy.

    What You Need To Complete The Job:

    Masking tape | Grout | Rubber faced grouting float | Large flat sponge | Bucket or basin | Water | 2 x cloths

    Step 1: Preparation
    Use masking tape to protect any painted surface in the immediate vicinity, e.g. skirting boards. This will help to give a clean, straight finish.

    Step 2: Apply Grout
    Grout is available in a powder form that needs mixing or in a ready to use formula. If you have purchased the powder form, follow the manufacturer’s instructions to mix it up. Apply a dollop of grout to the area over the gaps in the tiles. Use a rubber faced grouting float to push the grout into the space between the tiles. Try to ensure the grout penetrates right down to the bottom of the gap and that you leave no air pockets or bubbles.

    Step 3: Spread & Scrape Grout
    Using the edge of the grouting float, scrape the excess grout from the surface of the tiles in a diagonal direction so as not to disturb any grout between the tiles. The grout should be perfectly flush with the top of the tile to ensure any surface water runs off and does not become trapped in the gap on the finished floor.

    Step 4: Sponge Clean
    After completing the above steps across the whole floor, wait 20 to 30 minutes to allow the grout time to harden a little. Using a bucket of clean water and a large flat sponge, dampen the sponge and wipe it across the tiles in a diagonal direction. Roll it slightly upwards as you wipe to remove excess grout but try not to disturb the grout between the tiles. Rinse the sponge after every wipe and squeeze it so it is just damp. Keep the sponge as free of grout as you can during this process.

    Step 5: Final Clean
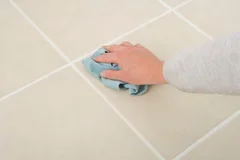
    Once the grout has hardened completely, the tiles will be left with a haze of grout residue on them. Clean the tiles using a damp, clean cloth and then buff immediately with a dry cloth.


  • Top 10 Must-Have Tools

    Top 10 Must-Have Tools

    Every home needs a basic tool kit to resolve the more straightforward household issues as they arise. Such problems usually occur when you least expect it, so being equipped in advance is half the battle. No shed or toolbox is complete without the following 10 items.

    Shopping List

    Tape measure | Drill | Drill bits | Torch | Screwdriver | Hammer | Adjustable wrench | Hand saw | Torpedo level | Needle-nose pliers | Utility knife

    1. Tape Measure
    Having a reliable method of taking accurate measurements is essential. The fact that the tape measure is used daily by professionals across a variety of fields says it all! It offers pin-point accuracy when measuring anything from the diameter of a small hole to the dimensions of a large room.

    We recommend a retractable tape with a thumb lock for ease of use.

    2. Electric Drill & Bits
    The drill is one of the most versatile tools out there. Like the tape measure, it is used widely across various industries. It makes the creation of a hole or the insertion of a screw effortless.

    3. Torch
    A torch is a necessity in every home, especially for DIY jobs in dark corners, under the stairs or in the attic. It also has its time to shine when there’s a problem with the electricity.

    4. Screwdriver
    The screwdriver is yet another vital item, which is dynamic in its uses.

    The Phillips screwdriver is generally preferable due to its increased strength; however, a flat screwdriver is needed for its matching screw types.

    5. Hammer
    Having a hammer in your shed is a no-brainer! Its primary function is of course to drive items into places such as nails into a shelf or a wooden garden post into the ground. We recommend a hammer with a claw on one end to remove nails.

    You should choose a hammer with a comfortable grip that is a suitable size and weight for your needs.

    6. Adjustable Wrench
    An adjustable wrench is a multi-purpose gripping tool, ideal for undertaking various household tasks.

    A fixed-size wrench is generally stronger than its adjustable relation, though can only be used if the feature that needs to be loosened or tightened fits the wrench.

    7. Hand Saw
    Around since Ancient Rome, the hand saw remains a valued tool, even with the motor-powered saws now available on the market. Its portability is an advantage; it is light and doesn’t require a power source. Manual sawing also allows for more detailed work and is safer. It is more agile for tight, confined spaces where a powered saw would be dangerous.

    8. Torpedo Level
    After a dripping tap, is there anything more annoying than a picture or mirror not hanging straight? A torpedo level is essential for the installation of anything that needs to be straight or aligned, e.g. shelves, skirting boards, cupboards, etc.

    9. Needle-Nose Pliers
    Having a pair of needle-nose pliers to hand can be of immense value across a wide variety of common household tasks. Its most popular use is by electricians working with the wiring. Other uses include assembling furniture and holding nails in place while hammering.

    10. Utility Knife
    A utility knife is highly useful for the swift and precise cutting of light material. There will always be cutting jobs that require a simpler solution than a hand saw or power tool and this is the solution.

    We recommend a retractable utility knife. Retracting the blade when not in use is safer and also helps maintain the blade.

  • 10 Simple Shed Storage & Organisation Ideas

    10 Simple Shed Storage & Organisation Ideas

    A well-organised shed will save you the time and energy otherwise wasted rooting for what you need or trying to squeeze your lawnmower back in. Our clever and easy shed storage and organisation ideas will help you organise your shed.

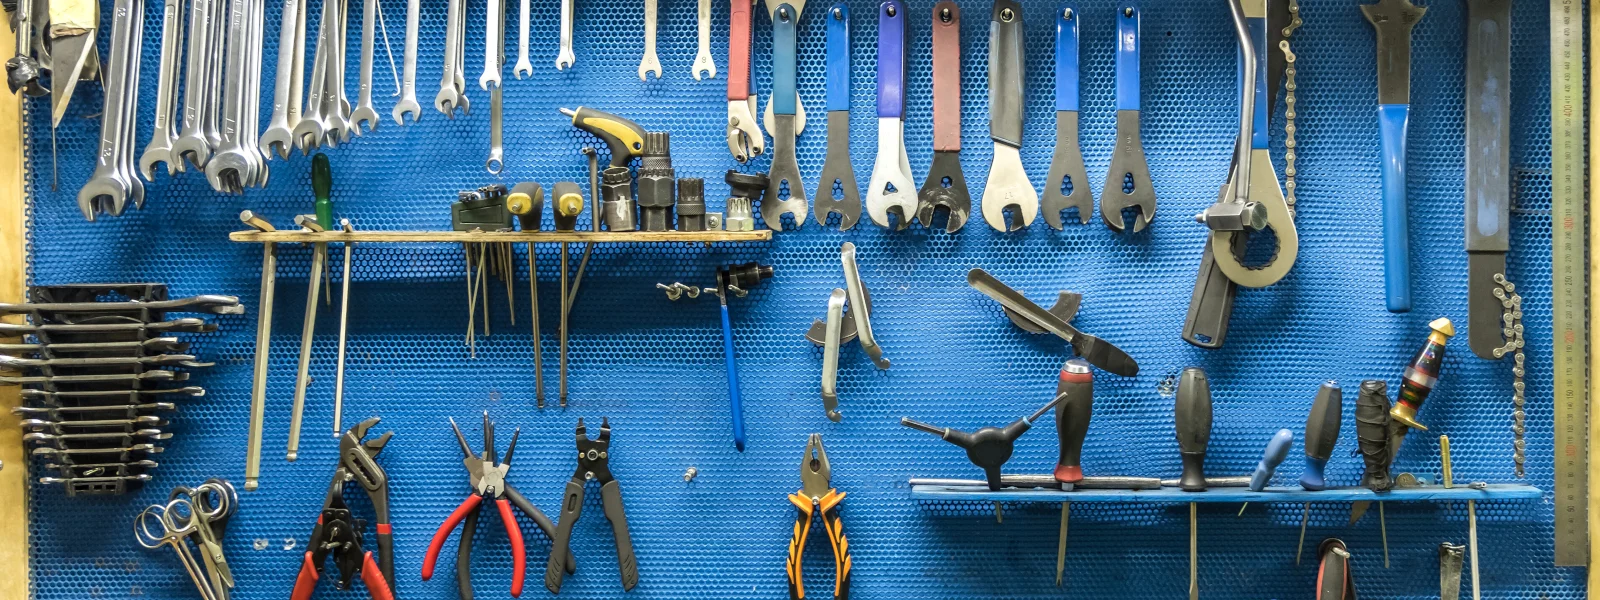
    1. Keep hand tools handy! Install hooks on the wall or the back of the door to hang small hand tools and paint brushes.

    2. Hang long-handled garden tools, so they are easily accessible but out of the way. Attach a tool hanger to the wall and store your long-handled tools like rakes and shovels, in a neat and orderly line.

    3. Use a garden carry-all. Keep frequently used items together, such as gloves, hand tools, twine, pruning shears and weed killer in a handy basket, crate or carry-all bag. This makes it quick and easy to grab what you need and go, rather than rummaging around collecting all the same bits each time you want to tend to your garden.

    4. Take advantage of the power of magnets. Use magnets to hold and organise metal tools such as pruning shears, trowels, screwdrivers and even drill bits. Mount a strong magnetic bar in an easy-to-reach spot on the wall.

    5. Shed Shelving is Essential. As you may be gathering from our first few tips, the key to a tidy and organised shed is getting as much off the floor as possible. That means optimising all available wall space. Shelves tend to become untidy quickly, but a few are necessary to store tool cases, plant pots, etc. to free up floor space.

    6. Use jars to store small objects. Jars make an ideal and cheap storage place for screws, bolts, nuts and bits. Choose see-through jars so you can spot what you’re looking for easier. Mounting jars to the underside of a shelf will save yourself valuable shelf or counter space. Simply attach the lid of the jar to the underside of the shelf with two or three screws, and you can then unscrew the jar from the lid when you need it.

    7. Use the ceiling space. Make the most of the shed space by using the ceiling to create overhead storage. There are hooks and rails available from which you can hang storage crates. Take care to mount objects safely so there is no risk of them falling down. You will also need to be aware of the construction of your shed and the maximum weight the ceiling can safely support.

    8. Label everything. There’s no bigger frustration when it comes to shed organisation than having to open box after box to find what you’re looking for. Use a label machine or a good, old-fashioned marker to clearly mark what is in each box.

    9. Keep your hose untangled. Untangling a garden hose is a difficult job for even the most experienced gardener! Keep your hose tangle free by hanging it on a hanger or reel, or by wrapping it around an old bucket.

    10. Clear out. Every now and again make sure to clear out junk from your shed. Get rid of any unwanted or broken garden items that are just taking up valuable space in your shed. If unwanted or unused items are in good condition, consider selling them online or better again, donating them to your local charity shop.

  • Quick Tips to Save on Heating Your Home

    Quick Tips to Save on Heating Your Home

    With some of the coldest winters since records began along with the ever-rising cost of utilities and new taxes and charges; household budgets are under pressure. Check our list to see if there is anything else you can do to save.

    Shopping List

    Attic insulation | Lagging jacket | Heat barriers | Heavy curtains | Solid fuel stove

    Turn Down Your Thermostat
    You’ve probably heard it before, but turning down your thermostat really is one of the most effective ways to reduce your heating bill. Most homes get a little too warm too quickly when all you need is to regularly take the chill out of the air and maintain a comfortable temperature. You can reduce each heating bill by up to 10% by turning down your thermostat by just one degree! Try one degree, to begin with and you may find you are happy to turn down by another degree, further cutting your costs.

    Bleed Your Radiators
    Trapped air in your radiators greatly reduces their effectiveness and the efficiency of your central heating system – a costly system to operate. Air becomes trapped in radiators over time and therefore should be regularly checked and bled if necessary.

    Service Your Boiler
    Servicing your oil or gas boiler will improve efficiency by up to 10%, saving you money on heating costs while also reducing CO2 emissions and improving the boiler’s reliability and safety. This 10% increase in efficiency will save you up to €150 per year. The service should be carried out by a qualified service technician or service engineer; for oil they need to be OFTEC registered, and for gas they need to be RGII registered.

    Compare Prices
    Thankfully the market has become more competitive in Ireland. You should benefit from this by comparing the price you are currently paying against those offered by alternative suppliers in the market. Continue to check your bill for price hikes and opportunities to save, and never stop comparing.

    Insulate
    The worst offenders for heat loss in a house are the attic and the windows. Most modern homes now have double-glazed windows, but if your home has single-glazed you should consider investing in new windows to save money in the long term. Warm air rises and without proper attic insulation, it will rise right out of your home. Insulating your attic can save you up to 20% on your heating bill.

    Also, putting a good quality lagging jacket on your hot water cylinder will keep water hotter for longer, and will pay for itself in just a couple of months. Finally, there are heat barrier products available for wall-mounted radiators, made from reflective foil and insulation. By placing them behind radiators – particularly those mounted to external walls – you will maximise heat output and minimise any heat loss into the wall.

    Close Curtains at Night
    Invest in some heavier curtains for the colder months of the year. Simply by closing them at night you will reduce heat loss in your home. Just make sure they aren’t blocking your radiators.

    Consider a Solid Fuel Stove
    Solid fuel stoves are up to three times more efficient than an open fire and offer superior performance and control. Boiler versions can even heat your home’s water and radiators too.

  • How to Install Insulation on Your Cold Water Tank

    How to Install Insulation on Your Cold Water Tank

    Ball valves control the level of water in your cold water tank. Over time the valve can become seized and will need to be replaced. When a ball valve stops working correctly, water will start dripping or flowing from the overflow pipe of the tank. Our simple step-by-step guide will help you fit a new ball valve.

    What You Need To Complete The Job:

    Protective gloves | Knee pads | Goggles | Dust mask | MDF board (or similar for kneeling on) | Adjustable wrench | New ball valve | Dry cloth

    Step 1: Turn Off Water
    Turn off the water at the mains.

    Step 2: Unscrew Feed pipe
    Wear protective gloves, knee pads, goggles and a dust mask as fibreglass insulation can cause respiratory and skin irritation. You should also avoid disturbing the insulation as much as possible.

    Lay an MDF board (or similar) over your attic insulation so you can kneel down comfortably beside the cold water tank. Using an adjustable wrench, unscrew the feed pipe instantor fitting.

    Step 3: Detach Feed Pipe
    Pull the copper pipe away from the ball valve housing.

    Step 4: Undo Retaining Nut
    Undo the retaining nut outside the water tank and remove the ball valve by pulling the valve body from the water tank.

    Step 5: Insert New Ball Valve
    Insert the new ball valve assembly, checking to make sure that the ball is securely attached. Pass the threaded valve housing assembly through the hole in the water tank and tighten into place with the retaining nut.

    Step 6: Reattach Feed Pipe
    Push the copper pipe, complete with its olive (the soft brass ring at the end of the pipe), into the valve body and tighten the instantor fitting firmly but carefully. It may be necessary to change the olive if it shows signs of damage. Dry the fitting thoroughly.

    Step 7: Check for Leaks
    Turn the water back on again at the mains, and check the new joint for any leaks by holding a dry cloth directly underneath the newly tightened fitting. If the joint is tight and there is still some water escaping, you have a damaged or deformed olive and you will need to replace it.

  • Create Your Own Vegetable Patch

    Create Your Own Vegetable Patch

    Growing your own fruit and vegetables is healthier as it allows you to control how your food is grown, choosing organic methods if you wish. It is also much cheaper, thus reducing your weekly grocery bill.

    Shopping List

    Spade | Fork | Hoe | Secateurs | Trowel | Rake | Watering can | Gardening gloves | Compost | Vegetable seeds

    Creating your own vegetable patch takes less time, effort and money than you may think. If you can give it an hour each week, you will be astounded with the results, and will want to maintain your dedicated area each year.

    Where to Put Your Vegetable Patch

    The first decision you need to make is choosing a location for your new vegetable patch. If space is limited, don’t let that deter you from proceeding. Whether you have acres of land, a small garden, a balcony or just a windowsill, there is always space to grow your own fruit, vegetables and herbs. A common misconception is that you will need a greenhouse. Although greenhouses are very useful for growing your own food, they are not a necessity. Ideally you should look for a dedicated and raised location, whether a bed in your garden or large pots on your window ledge or balcony. This will allow more sunlight to reach the plants. Your crops will need all the sun’s vital nutrients to grow so avoid obstacles that may shade them such as hanging trees or buildings.

    Essential Tools to Create & Maintain Your Patch

    Having the right tools to hand will make this project much easier and enjoyable. Must have tools include a spade, a fork, a hoe, a pair of secateurs, a trowel, a rake, a watering can, gardening gloves, and some comfortable garden clothes. Smaller versions of these tools may be more suitable for you depending on the size of your patch. Costs vary and you will want to stay within budget, however you should always try purchase higher quality tools where possible, for longevity.

    The Perfect Soil

    You will need good soil quality in your vegetable patch to support growth and provide nutrients to the various crops. Adding garden compost or soil conditioner to your existing soil will help. You will also need to check that your vegetable patch is well drained so that your growing vegetables will not get destroyed in a heavy rainfall. To check this you should fill your vegetable patch with water before you plant your seeds and if the water is still there the following day you will need to take steps to improve the drainage.

    What to Grow

    When your vegetable patch is ready to be planted, you will need to decide what crops you would like to grow. There are hundreds of vegetables, fruits and herbs that flourish in Ireland at different times of the year. Use your personal taste preference and the time of year to help you choose your crops. Your local garden centre will be able to give you some direction on what crops to choose if you are unsure. The next step is whether to grow from seeds or from a plug plant; the latter is less effort and less risky. We recommend experimenting with growing from seeds first to allow you to watch the growing process. Within weeks you will be eating your own freshly picked vegetables and fruits and the satisfaction is enormous.< Here are some ideas of what to grow in each season:

    – Winter – asparagus, garlic, shallots, peas, rhubarb, lettuce, onions, and spinach.
    – Spring – carrots, cabbage, herbs, beetroot, tomatoes, lettuce, spring onion, potatoes, and peas.
    – Summer – beetroot, cabbage, cauliflower, carrots, celery, lettuce, parsnips, radish, squash, and tomatoes.
    – Autumn – beetroot, broccoli, cabbage, carrots, cress, leeks, lettuce, onion, peas, shallots, turnip, and spinach

  • How to Plaster an Interior Wall

    How to Plaster an Interior Wall

    Plastering can be a messy business so lay down a protective floor covering such as a tarpaulin or laminated dustsheet before you start.

    Cleanliness is absolutely essential when plastering. Any grit or dirt that end up in your mix or on the trowel will end up spoiling the smooth finish of your walls. Vacuum clean all surfaces and the floor before starting.

    Wash all plastering tools before starting and after applying each layer of plaster using a washing up brush.

    If you are about to plaster a fresh brick wall, it may be necessary to seal the wall with a 50:50 PVA and water solution first. This will stop the wall from sucking all of the water from the freshly applied plaster, which will ensure the plaster remains workable for longer and does not dry out. The wall should be completely dry before you begin plastering.

    step2_240x240

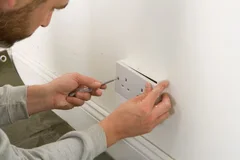
    Remove all sockets, curtain rails and other obstacles from the wall.

    step3_240x240

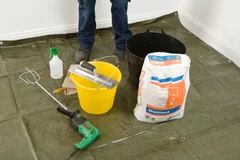
    Gather all the items required.

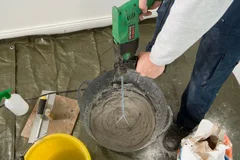
    Fill your mixing bucket to 25% of its capacity with water, and then add the plaster to the water bit by bit. Use an electric drill with a plaster mixing paddle to get a professionally smooth consistency.

    While mixing, scrape the edges of your bucket with your trowel to include all dry material. Keep adding plaster until you reach a consistency resembling that of thickly whipped cream; when you withdraw the paddle it should leave a hole in the mixture.

    step5_240x240

    Mist the surfaces of your trowel and hand board with water from the spray bottle. This helps prevent the plaster from sticking.

    Using the trowel, load two scoops of plaster on to the handboard.

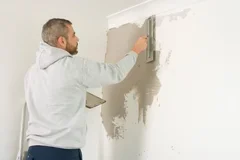
    Load the plastering trowel from the handboard. Start plastering from the corners and work towards the centre. If you are right-handed, start at the top left-hand corner. If you are left-handed, start at the top right-hand corner.

    Lay down the first coat roughly. Don’t worry about smoothing at this stage, just aim to get the material onto the wall. Don’t be too careful going around obstacles either, they can be dealt with at a later stage.

    Allow the plaster to set for 10-15 minutes, then starting in the corner again, run the trowel over the surface of the wall using long, deliberate strokes to smooth out any bumps or hollows and to make the surface smooth enough for the second coat. Ensure an even thickness of coating around obstacles at this stage.

    As mentioned in step 1, it is now time to wash all the plastering tools in a bucket of water with a washing up brush.

    Apply a second coat, much thinner than the first. Use broad strokes, backwards and forwards to lay a smooth top layer.

    Run a wet brush along the edge where one wall meets another wall or the ceiling. This helps to produce a smooth inside corner.

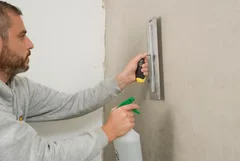
    Use a spray bottle to dampen the surface of the wall as well as the plastering trowel with water. Then use long deliberate strokes to smooth out the plaster as much as possible.

    If you have not achieved the smooth finish you require after a few strokes, don’t be tempted to think that you can fix it later by sanding it flat. It is impossible to properly sand plaster smooth. Keep skimming and polishing the plaster while it is damp and have patience, it will pay off in the end.