Author: admin

  • Exterior Painting Tips – Do’s & Dont’s

    Exterior Painting Tips – Do’s & Dont’s

    Painting the exterior of your house can transform its look and even increase its value. A fresh coat of paint will also protect your walls from weather damage. Before you paint your house, check our tips, do’s and dont’s to ensure a professional result.

    Shopping List

    Exterior paint | Paint brushes | Paint rollers | Paint roller tray | Work gloves |Laminated dust sheet | Ladder

    Do…

    Use the Right Type of Exterior Paint
    Use a  paint that is specifically for exterior walls; even better if it’s Irish as it will be formulated to withstand the harsh Irish weather. Exterior paints also dry quicker and resist mould and mildew better than alternative paints. Ask a member of staff at your local Topline for help finding the right paint.

    The Maths
    Calculate the amount of paint you will need in advance, so you don’t run out halfway through painting or waste money on excess paint. There are paint calculators available on the websites of most brands of paint.

    Prepare Your Paint Tools & Equipment
    Make sure you have everything you need before you start to prevent any frustrating delays. The bare essentials include paint, of course, a ladder, paint brushes, a paint roller, a roller tray, work gloves and a laminated dust sheet to protect the ground.

    Invest in a Good Ladder
    Your safety while painting high areas is largely dependent on your ladder, so invest in a high-quality and sturdy ladder. See our guide on using a ladder safely. If you are painting a very high building consider using scaffolding or a hoisting crane. See also our guide to ladders and ladder safety.


    Use the Right Paint Rollers & Brushes
    As any good tradesperson will tell you, you need the right tools for the job. Use paint brushes and rollers that are designed for exterior surfaces. These generally have longer bristles or piles to hold more paint for applying to uneven and textured masonry surfaces.

    Check the Weather Forecast
    Your walls will need to be dry before painting, and there will need to be sufficient time for your paint to dry before it rains. Exterior paint is usually rainproof within an hour but if it rains too soon your paint can run onto the ground.

    Stir Your Paint
    Stir the paint thoroughly before painting. Use a long stirring rod or an old wire hanger to ensure the paint is mixed well. Then start painting from the top and work your way down.

    Don’t…

    Cut Corners When Preparing the Paint Surface
    An excellent finish depends on the proper preparation of the surface before painting. Use a  pressure washer to remove any loose paint and dirt. If any flaky paint remains, use a scraper to remove as much as possible. Repair any damaged surfaces and fill any holes or cracks. A clean surface will help the new paint adhere to the surface.

    Dispose of Paint Incorrectly
    Check your local council website to find out how to responsibly dispose of leftover paint and chemicals in your area.

    Overreach
    If you try to overreach to paint a larger area instead of moving the ladder, you risk injury and a poor and inconsistent paint job with a streaky finish.

    Rush the Painting
    You will get better results if you are patient and take your time.

    Forget to Clean your Paint Brushes & Rollers
    If the paint is left to harden on your brushes and rollers after use, it is usually impossible to use them again. Give them a good clean to ensure value for your money. See our guide on how to clean your paintbrushes.

  • 4 Creative Ideas for Painting Your Garden Shed

    4 Creative Ideas for Painting Your Garden Shed

    With some clever use of paint, you can help your garden shed either blend in seamlessly or become a bold standout feature! Let us inspire you to create your very own garden shed masterpiece.

    Shopping List

    Paint | Paint brushes | Step ladder | Masking tape | Dust sheets | Sandpaper

    Garden sheds were once unloved, spider-infested, and hidden at the bottom of the garden, but a new trend of ‘man caves’ and more recently the ‘she shed’ has elevated the common garden shed to a whole new status. We are now decorating our sheds to show taste and personality and using them for DIY projects, crafting or as a relaxing hideaway. It can be scary to experiment with colour inside the home, but when it comes to garden sheds you don’t have to worry what others think and can show your more fun side. Adding colour to a garden shed can lift a garden design from ordinary to extraordinary. So here are a few tips and tricks to help you add a splash of colour to your garden shed!

    Quick Note! – Before you go splashing colours on any walls, make sure your building is not in a conservation area or is a listed building as some restrictions may apply to the colours you are allowed to use. It also might be a good idea to check with your neighbours, especially if the shed is in view of them. The last thing you want is to upset your neighbours.

    Adding a Statement Colour
    The predominant colour in gardens is green; green trees, green grass and green plants, so to create a bold statement pick a complementary colour to green. Complementary colours are colours opposite one another on the colour wheel. So what’s the opposite of green on the colour wheel? Think reds, pinks and purples. By using these colours, you make the green look even greener and add a wonderful splash of colour to your garden.

    Did you know? Some of the greatest writers, such as Rudyard Kipling, Agatha Christie and Roald Dahl wrote in their garden shed.

    Colour Inspiration
    When going for a theme in a garden, such as a seaside theme, it can be obvious to go for blue tones but here are a few more colours to inspire a theme in your garden.

    Deep royal blue is often the colour associated with Mediterranean climates. It tends to blend in well in a garden, but also offers a punch of colour and personality.
    Strong magenta pinks are a colour to use with caution, but used well can make a garden pop. Soft pink when overused can make a garden look babyish and girly, use sparingly.
    Rich plum blends in well with the deep greens of a garden but has a hint of playfulness.
    Lavender gives a garden a soft spring feel.

    Bright red is especially suited to Asian-influenced gardens.
    Hues of yellow and orange can inspire happiness but can be extremely tricky to use in the garden due to there already being so many of these colours found naturally in the garden. If you are confident with colour play around with different shades but start small.

    Stripes and Spots
    The panels on a garden shed lend themselves perfectly to painting alternating stripes of colour. This is easy to achieve even if you’re terrible at art, just simply paint along each panel with a different colour. Why stop at stripes; use the lid of a paint can, making sure there is no wet paint on the lid, as a template to draw circles and give your shed a polka-dot makeover!

    Top Tip – Make sure to plant around the border of the shed to prevent it from looking as though it had just been plonked into the garden. Do this by placing planters or pots around it or digging a border and filling it with flowers and shrubs.

    The Subdued Option
    If you aren’t brave enough to show the world your eccentric side or if you are a believer in the classic garden shed look, here are a couple of subdued ideas you can try:

    Try painting the outside with a neutral colour and then a bright pink or orange on the inside for a fun pop of colour.

    Paint the shed a dark green or brown, which will help it blend in with its surroundings.

    Choose colours that sit close together on the colour wheel such as blue; this will add a hint of colour without going mad.

    Remember, there are no rules (unless you’re in a conservation area)! Have fun and be proud of your garden shed. If you’re not happy with the end result you can always start again with a fresh coat of paint!

    Top Tip – Use the main colour used on your shed to paint flower pots, garden furniture and other garden features. This will help to pull your garden design together and give some consistency to your colour scheme.


  • Know Your Light Bulbs

    Know Your Light Bulbs

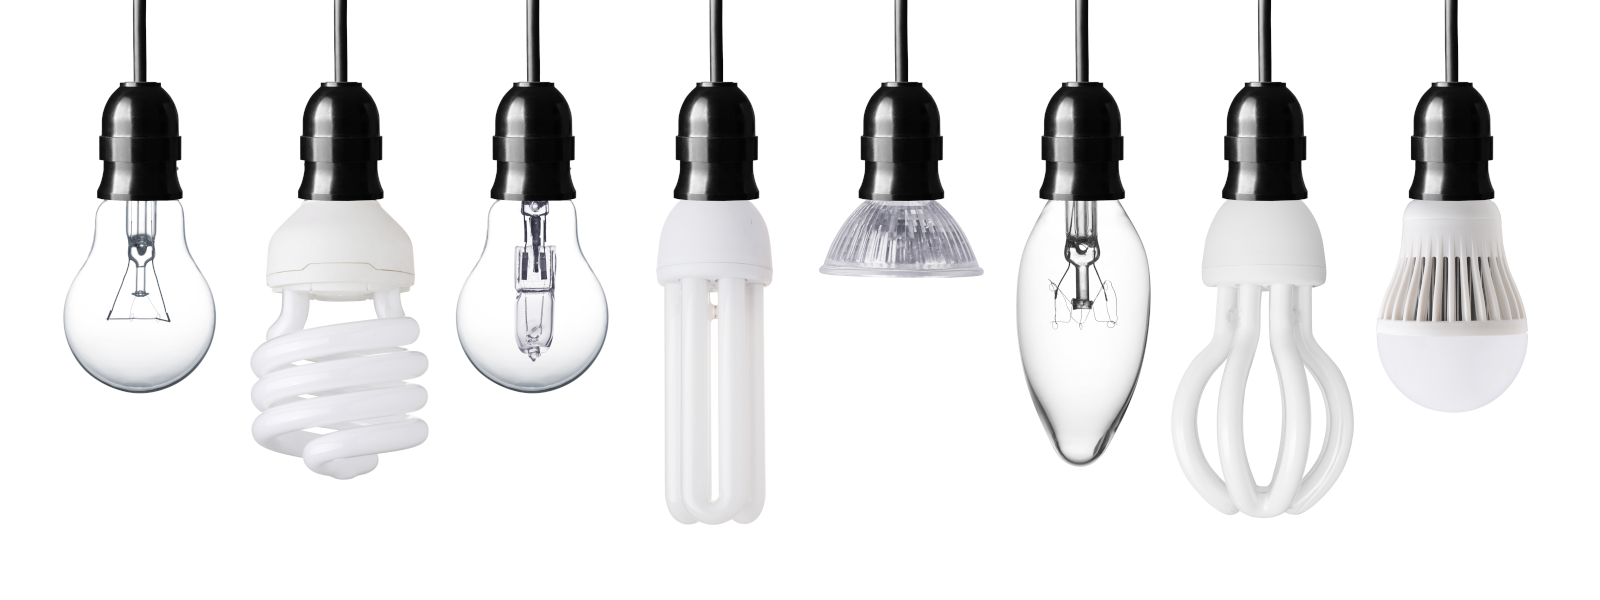
    Buying a light bulb is not as simple as it used to be. Since 2009, the EU has been phasing out incandescent bulbs in favour of more energy efficient varieties, and technological innovation has also increased the variety available.

    Shopping List:

    • Energy-efficient light bulb

    If you don’t know your watts from your lumens, we’re here to help.

    Cap
    The cap is the metal part at the bottom of the bulb. It connects the bulb to the light fitting and comes in the following four types: Bayonet (BC), Small Bayonet (SBC), Edison Screw (ES), and Small Edison Screw (SES). Before you go light bulb shopping, be sure to check which cap your light fitting requires or bring your old bulb into the store with you.

    Colour
    The colour of a bulb is measured in degrees of Kelvin and you will find this measurement on the bulb and/or its packaging. 2700 degrees Kelvin represents warm white and 3400 degrees Kelvin represents cool white.

    The colour of a light bulb will affect the ambience in the room. Cool white imitates daylight and is most suitable for working environments like offices and kitchens; where as warm white will complement a more relaxing atmosphere, ideal for bedrooms and living rooms.

    Type
    The types of light bulbs available in order of energy efficiency from best to worst are LED, Fluorescent Tube, CFL, Halogen, and Incandescent.

    In comparison to incandescent bulbs, LEDs use 75% less energy and provide up to 25 times the lifespan; CFLs also use 75% less energy while providing up to 10 times the lifespan.

     (excluding spotlights and reflector

    Energy Rating
    You will find an energy rating on the packaging of all light bulbs bulbs). The rating goes from A to G with A being the most efficient, and G the least. CFL and LED bulbs are usually rated A, and incandescent bulbs are usually E, F or G.

    90% of the energy used by incandescent bulbs produces heat not light. Energy-saving alternatives save money by not using up so much energy-producing heat.

    Watts vs. Lumens
    Just a few years ago, the wattage of a light bulb is how you knew how powerful it was and how bright its light would be. This is no longer the case. What the wattage really relates to is how much electricity it consumes, so since the introduction of energy efficiency to the light bulb market, wattage can no longer be seen as a representation of the bulb’s brightness. This is where lumens come in. Lumens are a unit of measurement for the amount of visible light emitted from a source. A 100-watt incandescent bulb will produce about 1600 lumens, the equivalent lumens can be produced from an 18-watt LED bulb.

  • How to Change a Light Fitting

    How to Change a Light Fitting

    You may need to change a light fixture if it has become faulty, or if you are decorating or renovating. It is a simple task once you know the necessary steps. Our step-by-step guide below will help you to safely and easily change a standard ceiling light fitting.

    What you need to complete the job:

    New light fitting
    Insulated screwdriver
    Wire strippers
    Sharp blade (in case there is difficulty removing the old fitting)
    Step ladder

    Step 1: Turn Off Power
    For safety reasons, it is critically important that the power has been turned off at the mains unit before beginning work on your light fitting. Just turning the light switch off is not adequate. Test the light to ensure the power is turned off.
    Ensure that everyone at home is aware of the danger of turning the power back on while you are working with the light fixture.
    Failure to complete this step may result in a serious accident during the installation process.

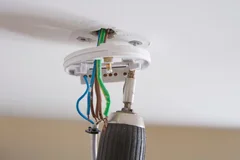
    Step 2: Remove Light Cover & Note the Wiring Layout
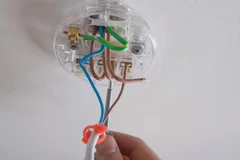
    Remove any light bulb(s) from the current fitting and carefully remove the light fitting cover to expose the wiring inside. Mark each wire so they can be replaced in the same position in the new fitting. Taking a quick photo on your phone is another handy option. This will make wiring the new fitting easier.

    Step 3: Remove Wiring
    Using an insulated screwdriver (also known as an electrician’s screwdriver), unscrew each of the wires from their terminals.

    Step 4: Unscrew Mounting Plate
    If your light fitting is secured by a mounting plate, loosen and remove the plate.


    Step 5:. Replace Wiring
    If there is any obvious heat damage to the wire ends, cut off the damaged end of the wire and then strip back a little insulation. This will expose enough of the copper to secure it to the new base successfully. Using your previously marked wires, replace them in the same position as before.

    Step 5:. Replace Wiring
    If there is any obvious heat damage to the wire ends, cut off the damaged end of the wire and then strip back a little insulation. This will expose enough of the copper to secure it to the new base successfully. Using your previously marked wires, replace them in the same position as before.

    Step 6: Replace the Cover & Fit Bulb
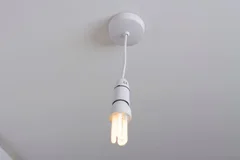
    Once the wiring has been replaced, screw the cover back in place and fit a light bulb. Turn the electricity back on at the mains unit and test your work by switching on the light. Well done, you have now successfully replaced your light fitting.


  • 10 BBQ Essentials – Your Ultimate Checklist

    10 BBQ Essentials – Your Ultimate Checklist

    Barbecues are about making the most of good weather and having fun. You don’t need much to have a great barbecue, but if you’re aiming for perfection you will need our ultimate checklist of the top 10 essentials for the perfect BBQ party.

    1. Find the Perfect BBQ
    Invest in a BBQ that meets your needs! Consider ease of use, preferred flavours and how many people you will be cooking for, as this will determine the size you need and whether gas or charcoal is best. Gas BBQs tend to be easier to light, use and clean than charcoal, but charcoal BBQs cost less and also flavour food more with that unique, smoky BBQ taste. A charcoal BBQ can take up to 40 minutes to reach the optimum cooking temperature, while gas is practically instant. Size-wise, think about the cooking area, how much you will fit in there at once, and how many people you will be cooking for.

    2. BBQ Fuel
    Remember your barbecue fuel or you won’t get very far with your barbecue! For a gas BBQ, you will need a canister of patio gas, which is available in 5kg and 13kg bottles. For a charcoal BBQ, you will need charcoal and lighter fluid. Don’t forget matches or a lighter too.

    Tip: add BBQ wood chips to charcoal to give food a unique and delicious flavour.

    3. Chimney Starter
    This essential is for those using a charcoal BBQ. A chimney starter will greatly speed up the time it takes for a charcoal BBQ to reach optimum cooking temperature. Follow our step-by-step guide to lighting a charcoal BBQ for further details.

    4.BBQ Utensils & Accessories
    If you’re going to do a job well you need the right tools. Long-handled utensils will keep your hands away from the hot grill and protect them from burns while allowing you to tend to your tasty delights. You will need a long-handled spatula, tongs and fork, to safely move food around the hot grill. You will also need knives, a marinade brush, a couple of chopping boards and an apron.

    5. Meat Thermometer
    When you cook meat on a BBQ it is critically important to make sure it is cooked all the way through. It’s easy to burn the outside and not cook the inside on a BBQ. A meat thermometer will help you know if the inside is cooked. The internal temperature of cooked chicken is 165°C, and pork and beef are 145°C. This will prevent any illness among your guests so they remember your party for the right reasons.

    6. BBQ Grill Brush
    Cleaning your BBQ grill with a suitable brush will prolong the life of the grill and improve the taste of your food the next time you cook. Scrub your grates while they’re still warm to remove any residue and burnt food. For a stainless steel or porcelain grill, use a brass bristled brush as it won’t scratch the surface. A tough wire brush is required for a cast iron grill to give it a good and vigorous clean. Check out our guide on how to clean a charcoal BBQ for more information.

    7. Garden Furniture
    Feeling relaxed and comfortable is key to enjoying a BBQ. You will need a sufficient amount of chairs and tables for you and your guests. Picnic rugs are a fun and easy way to make more room for children. Accessories like tablecloths, parasols, candles and vases of fresh flowers make all the difference. When setting up your BBQ, don’t forget the music. Find a safe and sturdy spot for your music player that’s out of the way but close enough to provide some subtle background music.

    8. Outdoor Heater
    Organising a BBQ in Ireland means contending with our notoriously unpredictable weather. A sudden cool breeze is all it takes to lower the mood at your BBQ party. Make sure guests stay comfortable with an outdoor heater such as a chiminea. It will also allow you to keep partying as night falls.

    9. Outdoor Lighting
    The fun doesn’t need to end when the sun goes down. With the vast array of outdoor lighting solutions available at Topline, you can easily shine some light on your party and make the most of the evening.

    10. BBQ Ingredients
    Your pre-barbecue grocery shop needs a bit of preparation. Write a shopping list of all the food, drink and condiments you need, as well as tin foil, paper towels/napkins and cleaning supplies. Do you have enough glasses and plates, or do you need paper plates and disposable cups? What are you going to cook? Outline a rough menu including mains, drinks and desserts. Here are some ideas that work well for a BBQ party: burgers, sausages, chicken skewers, prawns, sweetcorn, peppers, ribs, kebabs and salad; drinks: homemade punch, lemonade, iced tea, wine and beer; and desserts: pavlova, fruit salad and ice cream.

    There’s one more thing you’re going to need – company! Barbecues are the ideal excuse to get friends, family and neighbours around for a catch-up. Nothing helps a party atmosphere like the right people, and what better way to show off your cooking skills en masse!

  • 10 Tips for Small Kitchens

    10 Tips for Small Kitchens

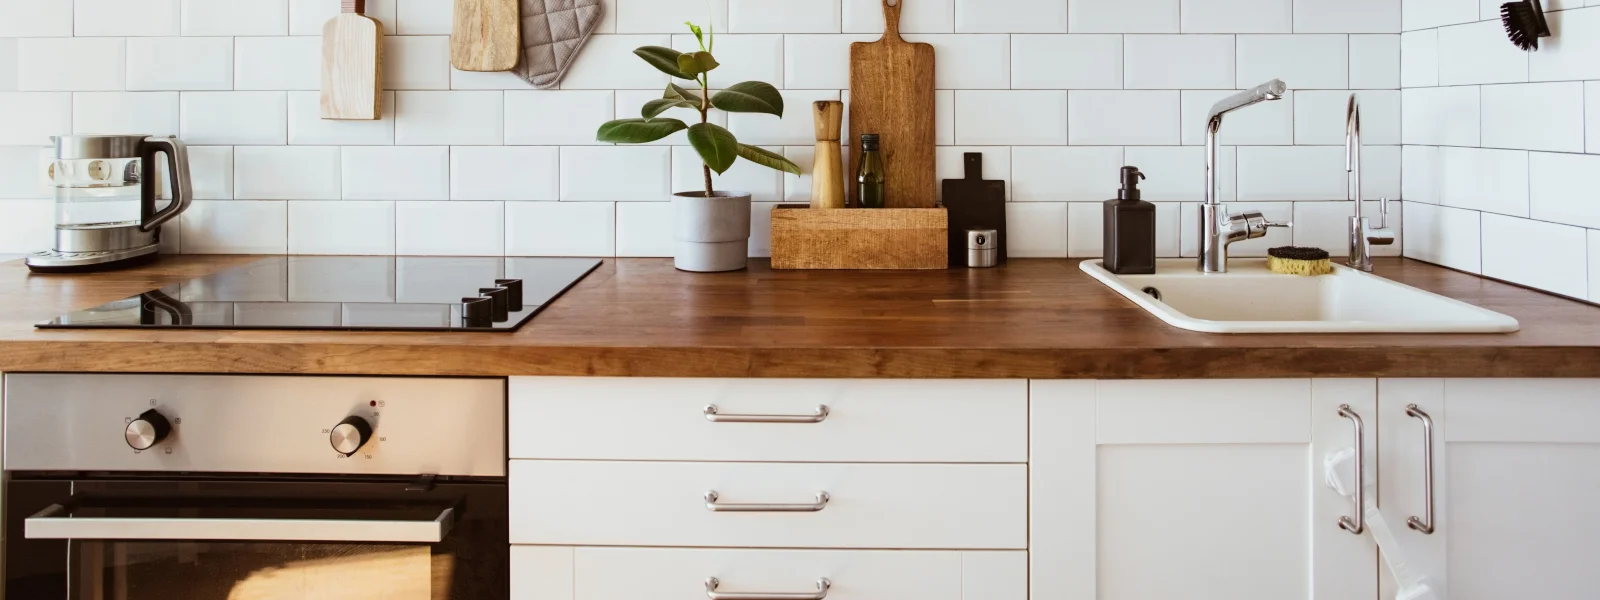
    Apartments and old houses often come with small kitchens, but just because they might be tight on space doesn’t mean they can’t be fully enjoyed. Our top 10 clever tips will help you overcome any obstacles its size may present.

    Shopping List
    Small kitchen appliances | Strip lighting | Mounting brackets | Shelves | Rails | Hooks | Racks | Slim line cabinet hardware

    1. Compact Appliances
    Where possible, choose small, compact kitchen appliances to optimise your space.

    2. Cabinet Lighting
    Adding spotlights or rope lights under and/or over cabinets will create the illusion of more space.

    3. Clever Fittings
    Mount your microwave hanging from the cabinet above it to free up some countertop space. Any other possible integration of appliances into your cabinetry will be valuable in your small kitchen.

    4. Islands or Bars
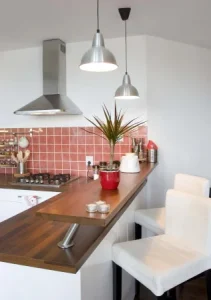
    If room allows, a small kitchen island will make a versatile and useful addition to the floor space. Alternatively, adding a stool to the end of the countertop creates a handy bar-like space.

    5. Keep it Light
    Painting small rooms in dark colours will make them feel smaller and more cramped. Choose lighter colours for the décor to enhance the feeling of space. Using the same colour on cabinets and walls will also eliminate any visual boundaries, giving the impression of a larger room. Keep any window dressings and lampshades light to enable as much light to enter the room as possible. If choosing any furniture for the room, avoid any chunky, bulky pieces and go for lighter here as well.

    6. Unclutter
    Only keep items in your small kitchen if they are absolutely necessary on a daily or weekly basis. Seek storage space for the rest of the items in other rooms. You will need as much space as possible to cook comfortably in your kitchen.

    Of the items that remain in your kitchen, try to find hidden storage for as many as possible. An uncluttered room with just a select few standout items will seem bigger and more stylish.

    7. Clean as You Go
    If you clean as you go while cooking, you will benefit from more space and less chaos. As soon as you have used an ingredient put it back in the cupboard or fridge, and when you are finished with a pan or chopping board, stick it in the dishwasher. This will just allow you more room and make your kitchen feel more comfortable to work in.

    8. Create an Alcove
    Any spare wall space presents an opportunity to create some flush storage space. It is relatively easy to carve out a shallow alcove between wall studs, which makes an ideal bookcase or cookware display.

    9. Shelves, Rails, Hooks & Racks
    Adding some shelves high up on a free wall, above door frames or in alcoves can look stylish when used to display the right items. Give less attractive items the cabinet space. A single glass shelf across a window can look great with house plants on it, freeing up further countertop space. Adding hooks and rails to the insides of cabinet doors make ideal spots for hanging saucepan lids, utensils, tea-towels, etc. Hooks and racks that match your décor can also look great on kitchen walls for displaying utensils or spices.

    10. Swap Cabinet Handles
    Swap cabinet and drawer hardware for much sleeker versions that don’t protrude as much. This will stop you bumping into them or catching on them as you work in your kitchen. It also reduces the visual clutter in the room.

     
  • Your Gardening Calendar for the Year

    Your Gardening Calendar for the Year

    With so much to do in the garden each season throughout the year, our easy-to-follow gardening calendar is essential to help you know what should be done each month.

    January
    January is a quiet month for gardeners, which makes it an ideal time to plan your gardening tasks and goals for the year. You can also use this time to buy seeds for the year ahead and to gather any tools or equipment you may need.

    If you feel like some exercise after being stuck inside during the winter, you can turn your compost heap over to help it to decompose evenly.

    Although you can prepare beds at any time of the year, deep digging is best done now before the end of winter. This will allow the disturbed ground to settle before planting.

    You can also recycle your Christmas tree by having it shredded, and then spreading it on beds or putting it on your compost heap.

    February
    February is a month of difficult-to-predict weather, ranging from spring sunshine to late frost. From mid-February, you can start to sow greenhouse-grown vegetables such as tomatoes, peppers and cucumbers.

    It is also a good time to start chitting early potatoes. Place the potatoes into trays and allow them to sprout. You can also now plant garlic, onions and shallots out in light soil.

    February is the last month until September in which you can trim hedges, so tidy up bushes and hedges now to keep them neat for spring and summer.

    March
    March is a busy month in the garden. Weather permitting, you can start to sow the following outside: carrots, parsnips, leeks, beetroot, lettuce, summer cabbage and cauliflower.

    Watch the weather forecast for frost warnings and cover outdoor seedlings with fabric to protect them during spells of frost. You will also need to protect seedlings from pests such as slugs with a suitable product, e.g. slug pellets, available at Topline stores.

    Start hoeing your soil regularly to keep weeds under control. It is also a good time to tackle weeds on paving, driveways and footpaths with weed killer.

    Prune and feed your roses; this will help them grow stronger and produce larger, more plentiful blooms in summer.

    And finally, it is time to plant your summer flowers and potatoes.

    April
    Another exciting spring month in the garden; as sunlight and temperatures increase, plants start to grow stronger and faster.

    Potatoes can be planted into deep drills.

    Pests such as greenfly will soon appear as conditions become right for them, so make sure to have a deterrent spray ready to deal with them.

    The lawn will need regular cutting from now on so it is a good time to service your lawnmower with an oil change. You should also feed your lawn and keep the lawnmower blades on a high setting for the first few cuts to encourage healthy grass growth.

    If you are planning a new lawn, now or September are the best months for sowing grass seed.

    And if you want to get a good run at barbeque season, get the BBQ out and give it a clean. Make sure you have the necessary fuel and accessories to get cooking al fresco as soon as summer sets in. You can get weatherproof BBQ covers at Topline stores to protect it during any April showers.

    May
    The long evenings are setting in and the summer garden is coming to life. It is time to plant your hanging baskets, containers and bedding.

    The leaves of roses should be sprayed once each fortnight to protect them against greenfly and blackspot. You will also need to keep a close eye on greenhouse plants for pests.

    Depending on the weather, you may need to water your garden and the plants in your greenhouse, particularly those which are newly planted.

    Keep hoeing vegetable beds to tackle weeds. Thin out vegetable seedlings. Feed tomatoes and strawberries with a suitable plant food.

    Continue to regularly mow your lawn and to apply lawn feed. Any moss or weeds in the lawn should be removed now too. This lawn care should be undertaken regularly until September.

    June
    June is one of the best months to get out, relax and just enjoy your garden; however there are a few tasks that should be done this month.

    The first early potatoes, lettuce and parsley can be harvested now and many fruit bushes will start to bear fruit. You can now sow further vegetables such as carrots, beetroot, beans, and lettuce.

    Make sure to keep watering flowers and vegetables during the summer. This is best done in the evening time when the sun is low and won’t evaporate the water.

    Weeds will be growing fast so keep weeding as much as possible.

    Be on the lookout for pests and diseases, and for plants that may need training or tying to poles for support.

    Deadhead flowering annuals and perennials to encourage more blooms throughout the summer.

    July
    July is an excellent month for bees and as you probably know already, they are essential for beautiful and productive growth in the garden. Planting colourful and fragrant flowers in your garden will attract them.

    If your compost heap is looking dry, give it a watering.

    Regularly give fruits, vegetables and flowering plants a liquid feed.

    Continue to deadhead flowers and weed regularly.

    Water your hanging baskets and containers daily.

    August
    As summer draws to an end, the long evenings of August should be mostly spend relaxing in your garden, reaping the benefits of all your hard work. There are just a few simple maintenance tasks that should be completed to keep things going nicely until next month.

    Continue deadheading, weeding, and checking for pests.

    Cut back any dead stalks and branches, and support any which may be going limp by staking.

    Regularly water fruit, vegetables, containers and baskets if the weather has been dry.

    Use a fork to loosen onion bulbs in the ground to prepare them for harvesting.

    September
    It’s autumn and the weather becoming cooler. You can now harvest your onions.

    Continue to be on the lookout for pests, e.g. caterpillars and red spider mite.

    As winds and rain pick up, you will need to stake more of your vegetables and other plants to keep them supported in an upright position.

    You can now also plant your bulbs for spring, e.g. daffodils, tulips and crocuses. It is best to get them planted before the frost comes.

    If you are planning a new lawn, now is an excellent time to sow the seed.

    October
    October can see the start of light frost spells. Disconnect hoses so the water doesn’t freeze inside them if sudden frosts occur, causing them to split.

    Lift carrots tender bulbs and store them before the frost. Parsnips however, are said to taste better if they’re exposed to a frost.

    Cut back perennials.

    You can continue to plant bulbs for spring.

    Rake fallen leaves off your grass and throw them in your compost heap/bin. This will help prevent moss growth on your lawn.

    Scarify your lawn (create small holes with a lawn aerator of garden fork) to aid drainage.

    November
    The clocks have gone back, the evenings are shorter, and your workload in the garden is quieting down for winter.

    Continue to rake up fallen leaves to allow for drainage, prevent moss grown on your lawn, and to keep your garden looking tidy.

    Tidy up and clean seed trays, planters, greenhouses and gardening tools, using a plant-friendly disinfectant where necessary, before storing them away for the winter.

    Lift and store any remaining vegetables.

    Mow the lawn for the last time this year, and clean grass off the lawnmower before putting it away in storage.

    Think of the birds now it’s winter, and provide suitable food in a feeder along with fresh water.

    Note, this is the best month of the year to plant trees or hedges in Ireland. Growth is dormant, which is more suitable for planting, and the rainfall will assist the roots in settling.

    December
    There’s very little that can be done in the garden in December due to rainfall and sub-zero temperatures. Enjoy the break from your gardening work!

    You can plant rhubarb now, as it does well in frost.

    It is also a good time to spread manure on beds, as the freezing and thawing water will help break it up and maximise the benefits.

  • Top 10 Must-Have Gardening Tools

    Top 10 Must-Have Gardening Tools

    When you’re new to gardening, it’s hard to know how to get started. Even the most experienced gardeners need to have the right tools. Our list of essential gardening tools will set you on the right path to a beautiful garden.

    What You Need To Complete The Job:

    Hand trowel | Secateurs | Hoe | Gloves | Spade | Fork | Shovel | Rake | Saw | Wheelbarrow | Scissors | Kneeling pad | Hose | Watering can | Outdoor brush | Loppers | Lawnmower | Shed | Lawn feed | Weed & moss killer

    1. Hand Trowel
    A hand trowel is a small tool that is essential for planting, transplanting and potting. Look for one with a sturdy connection between the blade and handle, and a comfortable grip on the handle to avoid hand fatigue and give you optimal control.

    2. Secateurs
    Also known as pruning shears, pruners or clippers, a garden secateurs is a very useful hand tool around the garden. You will need it for trimming and shaping plants and shrubs and for removing dead growth. High-quality secateurs will last a very long time, stay sharper for longer, be able to take thicker branches, and be more comfortable to use, so it is worth investing in a good one.

    3. Hoe
    A garden hoe is essential for cultivating your soil, edging your lawn, and countless other gardening tasks. This versatile garden tool comes in several varieties but a regular Dutch or Draw hoe will meet most gardeners’ needs. You will find it highly useful when preparing beds for planting and weeding.

    4. Gardening Gloves
    Thorns and splinters are as annoying and uncomfortable as they are preventable with a good pair of gardening gloves. Gardening tasks can wreak havoc on your hands, leaving them sore and irritated. Thankfully there is a huge range of gloves available offering better protection and comfort than ever before.

    5. Spade
    A spade has a long handle and a long, narrow, flat head. No gardening tool kit is complete without one! You will need it for digging tasks, as well as edging beds and lawns, transplanting, dividing shrubs, trenching, and lots more.

    6. Fork
    One of the most hardworking tools in any gardener’s arsenal, a garden fork is a multi-purpose piece of equipment. It can be used to aerate lawns (see our guide on Lawn Care & Maintenance Tips), break up compacted soil, create holes for seeds, mix in soil treatment, remove stones and weeds, and soften the tough ground. Its sharp and strong tines can more easily penetrate difficult terrain than a spade.

    7. Shovel
    A shovel is a prerequisite for most jobs around the garden, particularly those that include digging and the removal or addition of loose gardening materials such as compost, fertiliser, mulch, soil, etc. Whether you’re scooping away weeds or you’re spreading on mulch, digging a deep hole or filling a bed with compost, a high quality shovel will be of great value to you.

    8.Rake
    A rake will allow you to remove stones, rocks and clogs from the ground before planting. It is also used for levelling and smoothing the surface of the soil, or for gathering debris such as leaves and weeds. You may find you want to add a few varieties of rakes to your collection to suit different needs most comfortably, for example a lightweight, fan-shaped rake is ideal for covering large areas when sweeping up leaves, and a heavier duty bow rake will be most suited to dealing with stony ground.

    9.Saw
    Shrubs and trees will need shaping and pruning from time to time, not to mention those woody weeds like briars that will need to be tackled too. A bow saw will see you through most of the heavier cutting tasks in the garden; when a secateurs just won’t cut it!

    10.Wheelbarrow
    A wheelbarrow greatly eases the burden of moving heavy and awkward gardening materials around your garden. Lump everything including your tools into your wheelbarrow and easily transport them around as you work.

    Just outside of the top 10 are the following must-have gardening items: a pair of scissors, kneeling pads or a suitable cushion, a garden hose, a watering can, an outdoor brush, loppers, a lawnmower, and a shed to house all your tools and equipment. You will also need lawn and plant feed, and weed and moss killer to ensure healthy growth in your garden.